
You might think a burst pipe water extraction is only a plumbing issue, but the water spreads fast and starts damaging materials within minutes. You need to shut off the main supply, then extract standing water with pumps and vacuums matched to the surface. What happens next depends on how well you remove hidden moisture from walls, floors, and cavities, because the real cleanup doesn’t stop when the visible water is gone.
Key Takeaways
- Shut off the main water supply immediately to stop further flooding.
- Remove standing water quickly with pumps, vacuums, and squeegee tools.
- Move valuables, rugs, and loose items out of wet areas right away.
- Cut power to affected spaces if safe, and avoid wet zones.
- Use air movers and dehumidifiers to dry hidden moisture and prevent mold.
What To Do First After A Burst Pipe?
First, shut off the main water supply to stop the leak, then cut power to any affected areas if it’s safe to do so.
Next, move people and pets away from wet zones, and wear gloves and boots before you enter.
Document visible damage with photos for your records, then remove small valuables, rugs, and loose items from the floor.
If water is spreading, place towels or a wet vacuum at the edges to limit migration.
Open windows if conditions allow, but don’t use fans near standing water until power is confirmed safe.
Call a trusted burst pipe water extraction team right away so you’re not handling the cleanup alone.
Acting fast helps your home stay safer, and you’ll work with a crew that knows the process.
How Burst Pipe Water Extraction Works
You start burst pipe water extraction by removing standing water with pumps, vacuums, and absorbent tools.
Then you dry soaked walls, floors, and ceilings with targeted airflow and dehumidification to stop moisture from spreading.
These steps help reduce structural damage, limit mold growth, and speed up restoration.
Water Extraction Process
Burst pipe water extraction begins with rapidly locating the source of the leak, stopping additional flow, and then removing standing water with high-capacity pumps and vacuums.
You’ll see technicians map the affected area, choose extraction tools by surface type, and work methodically from the deepest pooling to the edges.
They use weighted wand vacuums on carpet, squeegee tools on hard floors, and targeted suction in confined spaces.
This process helps you regain control fast, with each pass reducing saturation and improving access to hidden moisture.
Crews monitor flow rate, waste removal, and equipment positioning so the cleanup stays efficient and organized.
You’re not left guessing; you’re kept informed, and the work stays focused, safe, and precise throughout the extraction phase.
Damage Reduction Steps
After standing water is removed, the focus shifts to limiting secondary damage before moisture spreads farther into walls, flooring, and structural cavities. You inspect affected areas, shut off the water source, and isolate wet zones to keep contamination from traveling.
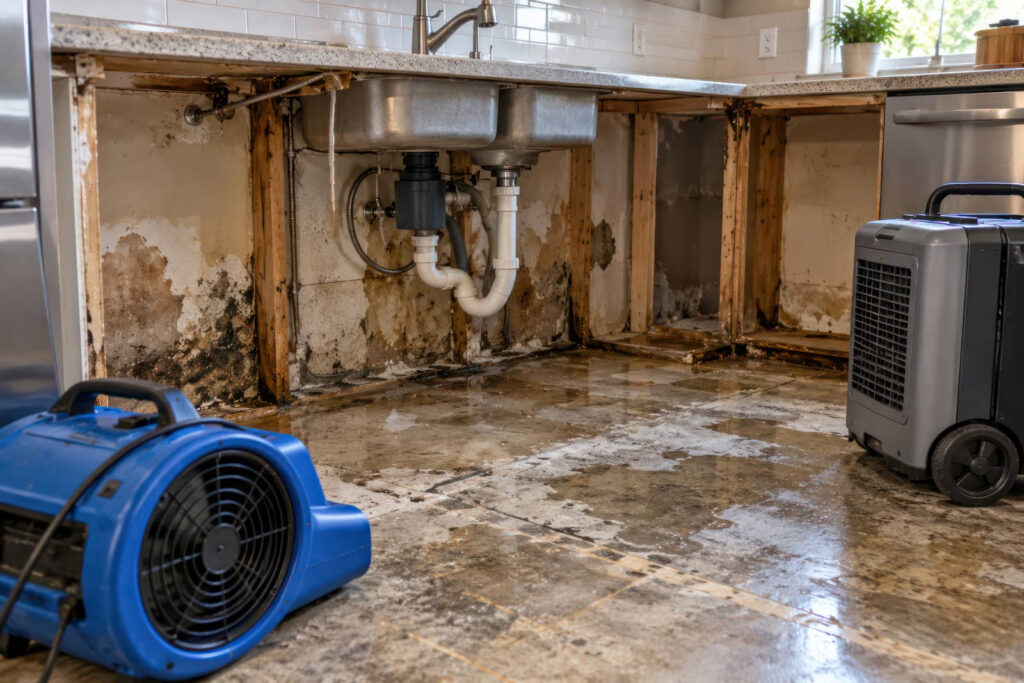
Next, you lift damp rugs, remove saturated materials, and open baseboards or small access points so trapped moisture can escape. You place air movers and dehumidifiers to pull humidity down fast, which helps protect framing, insulation, and subfloors.
You also monitor moisture levels with meters, so you know which areas still need attention. Acting quickly reduces swelling, warping, mold growth, and odor.
When you follow these steps together, you’re not just drying a room—you’re protecting your space and helping everyone in it feel secure.
How Water Is Removed From Walls And Floors
Water extraction crews remove standing water from walls and floors using pumps, wet vacuums, and specialized suction tools that pull moisture from porous materials.
You’ll see them work fast, because every minute matters after a burst pipe. They target carpet, trim, baseboards, and subfloor surfaces, then lift water until the area no longer feels saturated.
- Pump out pooled water
- Vacuum surface moisture
- Press suction tools on wet drywall
- Extract water from carpets and padding
- Remove liquid trapped at floor edges
You’re not dealing with this alone; the crew follows a clear process that helps your space recover quickly.
Their equipment handles heavy saturation better than household tools, so you get faster results and less damage.
How Professionals Dry Hidden Moisture
Even when visible water is gone, hidden moisture can stay trapped in drywall, insulation, subfloors, and framing. You need targeted drying to stop damage from spreading.
Professionals place air movers to increase evaporation and set dehumidifiers to pull vapor from the air. They open cavities, remove baseboards, and drill small access points when needed so airflow reaches enclosed spaces.
Moisture meters and thermal imaging help them track wet areas and confirm progress. They adjust equipment based on temperature, humidity, and material thickness, not guesswork.
You stay informed through readings and daily checks, so you know the structure’s drying correctly. This process helps your space dry evenly, limits secondary issues, and gets your home back to a safe, stable condition.
What Gets Restored After Water Extraction?
Once the water’s removed and the structure is dry, restoration can begin on materials that can be safely repaired or replaced.
You’ll usually see crews restore drywall, insulation, trim, flooring, and cabinetry when damage stays within repairable limits. They may remove saturated sections, patch structural openings, and install matching materials so your space feels whole again.
If contents were affected, they can also clean, dry, and return salvageable furniture, rugs, and personal items. Electrical fixtures, baseboards, and door casings may need targeted replacement to meet safe performance standards.
- Drywall and ceiling panels
- Hardwood, laminate, or tile flooring
- Insulation and vapor barriers
- Cabinets, trim, and baseboards
- Salvageable furnishings and contents
How To Prevent Future Burst Pipe Damage
You can reduce burst pipe risk by insulating exposed pipes in unheated areas and sealing gaps that let in cold air.
Check for leaks, corrosion, and pressure changes on a regular schedule so you catch failures early.
If you spot weak pipe sections, replace them before winter stress turns them into a rupture.
Pipe Insulation Tips
How can pipe insulation help prevent burst pipe damage? You can slow heat loss, limit freezing, and keep your plumbing safer through cold snaps.
Choose closed-cell foam sleeves for exposed pipes, and fit them tightly around elbows, joints, and short runs. Seal seams with compatible tape so cold air can’t reach the pipe surface.
In unheated areas, wrap both hot and cold lines, especially near exterior walls and crawlspaces. Keep insulation dry, intact, and continuous; replace damaged sections right away.
- Measure pipe diameter before you buy
- Cut sleeves cleanly for snug coverage
- Protect insulation from moisture and pests
- Use fire-rated materials where required
- Add extra wrap at vulnerable bends
Leak Detection Checks
Even with good pipe insulation, small leaks can still weaken joints, fittings, and hidden sections over time.
You should inspect exposed supply lines, valves, and appliance connections every month. Run a dry hand or paper towel along fittings, then watch for moisture, corrosion, or mineral buildup.
Check under sinks, behind toilets, near water heaters, and along basement ceilings for stains or drip marks. If your home has a pressure gauge, note any sudden drops.
Use your water meter: shut off all fixtures, then confirm the meter stops moving. Listen for hissing when the system is quiet.
If you spot any change, tighten, replace, or call a licensed plumber quickly. These checks help your household stay safer, drier, and ready.
Frequently Asked Questions
How Quickly Should Water Extraction Begin After a Burst Pipe?
You should begin water extraction immediately, ideally within minutes, to limit structural damage, mold growth, and secondary losses. You can reduce cleanup time and costs when you act fast and call professionals right away.
Can Burst Pipe Water Extraction Save Carpet Padding?
Yes, you can save carpet padding if you extract fast, dry thoroughly, and sanitize immediately. You’ll improve your chances with rapid response, strong airflow, and humidity control; delay, saturation, and contamination usually mean replacement.
Does Water Extraction Stop Mold Growth Completely?
No, you can’t stop mold growth completely, but you can greatly reduce it. You’ll need fast extraction, thorough drying, and humidity control. If materials stay damp, mold can still develop within 24 to 48 hours.
Will Insurance Cover Burst Pipe Water Extraction Costs?
Usually, yes, if your policy covers sudden water damage. You’ll need to document the leak, call your insurer quickly, and use approved restoration services. Review your deductible, exclusions, and claim limits before you proceed.
How Long Does Structural Drying Usually Take?
Structural drying usually takes 3–5 days, but you’ll need 1–2 weeks for heavier saturation. You can speed it up with airflow, dehumidifiers, and daily monitoring, so your space dries safely and feels normal again.
Summary
When a pipe bursts, you need to act fast, because water spreads like a thief in the night. Shut off the main supply, extract standing water, and dry hidden moisture before it wicks deeper into walls and floors. With the right tools and a clear plan, you can stop damage from snowballing and restore the space sooner. Stay alert, inspect vulnerable pipes, and insulate exposed lines so the next freeze doesn’t trigger another disaster.