

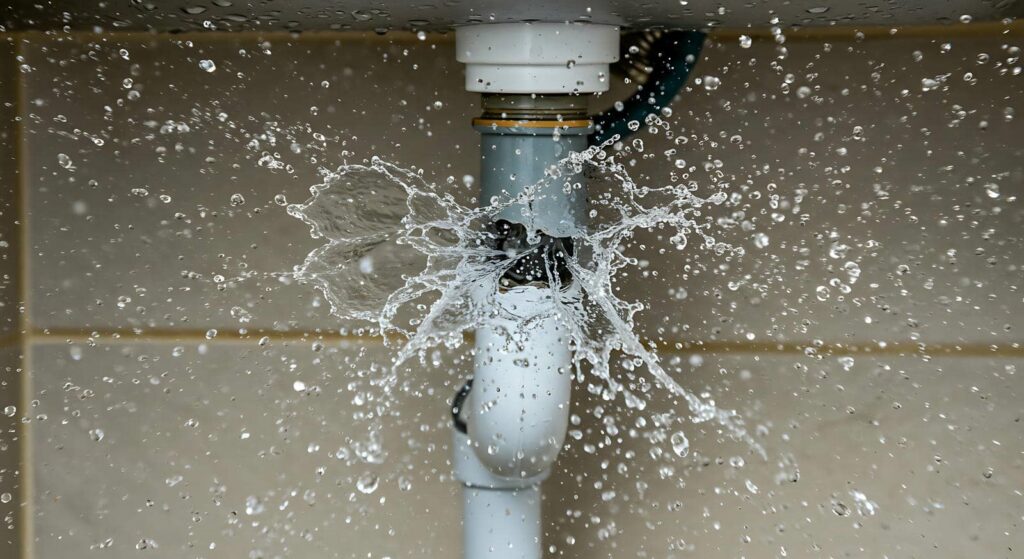
Could it be true that the first few minutes after a burst pipe determine how much damage you’ll face? You need to shut off the main water supply and cut power at the breaker, then contain runoff, remove wet items, and extract standing water fast. Dry the area, check for hidden moisture, and document everything for insurance, but some damage won’t show itself yet.
Key Takeaways
- Shut off the main water supply immediately, and cut power at the breaker if water reaches outlets or appliances.
- Contain the leak with towels or plastic, then remove standing water using a wet vacuum, mop, or pump.
- Document all damage with photos and notes before moving items, including affected rooms and visible water paths.
- Dry the area fast with fans, open windows, and dehumidifiers to prevent mold and hidden moisture damage.
- Call a water damage professional if drywall, insulation, floors, or electrical systems are soaked or unstable.
Shut Off Water and Power First
The first step is to shut off the main water supply immediately to stop the leak from spreading.
You then cut power at the breaker if water has reached outlets, appliances, or fixtures, because burst pipe water damage can create shock hazards fast.
Stay calm and move with purpose; your quick action protects everyone in the space.
If you can reach the valve safely, turn it clockwise until it stops.
Label the breaker panel if you need to avoid mistakes, and don’t touch wet switches or cords.
Confirm the water has stopped at the pipe, then document the affected area for your records.
You’re handling the first critical controls now, and that keeps your team safer while you prepare the next cleanup step.
Contain the Water Damage
Now that you’ve shut off the source, move fast to contain the burst pipe water damage before it spreads farther.
You should block runoff with towels, plastic sheeting, or absorbent socks along doorways and baseboards. Pull rugs, furniture pads, and loose items out of the wet zone so they don’t wick moisture into cleaner rooms.
If water is pooling, use a wet vacuum or mop to remove it in short passes, then wring and replace saturated materials. Open windows only if outdoor conditions help dry the space; otherwise, keep air moving with fans aimed across wet surfaces.
As you work, stay organized and protect nearby areas from tracking. You’re not dealing with this alone—steady, focused containment keeps the damage controlled and gives your restoration team a cleaner starting point.
Assess the Burst Pipe Damage
Check every affected area so you can gauge how far the burst pipe water damage has spread and what materials need immediate attention.
Inspect walls, baseboards, flooring, insulation, cabinets, and nearby fixtures for discoloration, swelling, or soft spots. You should trace the leak path to identify hidden migration behind trim and into adjacent rooms.
Note any electrical outlets, appliances, or structural members that were exposed so you can prioritize safe recovery. Document damage with photos and brief notes; this helps you stay organized and work with your restoration team.
If you’re part of a household or property group, share findings quickly so everyone understands the scope. Keep your assessment focused, systematic, and calm.
Accurate evaluation now helps you choose the right next steps and prevents overlooked damage from worsening.
Remove Standing Water and Wet Items
Shut off the water supply immediately to stop more flooding, then remove standing water with pumps, wet vacuums, or absorbent tools.
Take out soaked belongings, including rugs, furniture, and other porous items, so they can dry or be discarded before mold starts.
Protect unaffected areas by sealing off the damaged space and keeping dry materials elevated and separated from moisture.
Shut Off Water Supply
Turn off the main water supply immediately to stop more water from entering the pipe and worsening the damage.
Locate the shutoff valve, usually near the meter, basement wall, or utility area, and turn it clockwise until it stops. If you share the space with others, let them know fast so no one restores flow by mistake.
After the supply is off, confirm water has stopped at affected fixtures and check for pressure release. This step protects your walls, flooring, and framing from further saturation and helps you work safely.
If the valve won’t move or you can’t find it, call your utility provider or a licensed plumber right away. Acting together, you and your household can limit escalation and keep the cleanup manageable.
Remove Soaked Belongings
With the water supply off, remove standing water and pull out wet belongings as quickly as you can. Prioritize items by salvage value and moisture sensitivity, then work room by room so you stay organized and in control.
Lift rugs, cushions, and boxes first, because they trap water and accelerate wicking.
Move fabric, paper, and electronics to a dry area only if you can handle them safely.
Bag saturated textiles separately so you can sort them later for cleaning or disposal.
Use gloves and a sturdy bin to keep the process efficient. Don’t stack wet items, and don’t drag saturated furniture across floors.
If you act fast, you reduce staining, swelling, and microbial growth, and you give your restoration team a cleaner starting point.
Protect Unaffected Areas
While you’re clearing the area, keep the rest of the room protected by removing standing water and isolating any damp materials before moisture can spread.
Use a wet vacuum, mop, or pump to extract water from floors, then place wet towels, rugs, and small items in a lined container away from dry surfaces.
You should lift furniture legs onto blocks or foil to limit wicking, and move electronics, papers, and porous materials out of the affected zone.
Create a clean boundary with plastic sheeting if water is still migrating.
Check baseboards, trim, and adjacent rooms for hidden moisture, then dry those edges first.
This keeps your crew’s work focused, reduces secondary damage, and helps everyone stay organized while you control the cleanup.
If drywall feels soft, call restoration help quickly.
Dry the Area Before Mold Starts
Remove any remaining standing water right away, because moisture left on floors and baseboards can trigger mold growth fast.
You should increase air circulation with fans and open windows if conditions allow, but keep air moving across all wet surfaces, not just the visible ones.
Check behind walls, under cabinets, and inside insulation for hidden moisture, since trapped water can keep the area damp long after the surface looks dry.
Remove Standing Water
Pump out or soak up standing water as soon as you can to limit spread and slow mold growth. You need to act methodically so your cleanup team can work from the outside in and protect shared spaces.
Use a wet vac, sump pump, or absorbent towels to remove water from floors and low points.
Lift wet rugs, mats, and movable items so you can reach hidden pools beneath them.
Collect water into containers and empty them safely so you don’t reintroduce moisture.
Check corners, cabinet bases, and under appliances where water often lingers. Replace saturated towels when they’re heavy, and keep your footing stable.
When you clear standing water fast, you help your home feel recoverable again and give your crew a cleaner starting point for the next step.
Increase Air Circulation
Once the standing water is gone, you need to move air through the space right away to speed evaporation and reduce the chance of mold growth.
Open windows and interior doors if outdoor conditions are dry, then place box fans or air movers to push air across floors, walls, and baseboards. Aim the airflow so it sweeps damp surfaces and doesn’t just recirculate in one corner.
Keep HVAC fans running if the system is safe to operate, because steady movement helps the room recover faster. You’re not trying to cool the room; you’re trying to exchange humid air with drier air.
Check that vents stay unobstructed, and reposition fans as surfaces start to dry. Acting quickly helps your team protect the space and supports a cleaner, safer recovery.
Dry Hidden Moisture
Hidden moisture can linger after the visible water is gone, so you need to dry behind walls, under flooring, inside cabinets, and in insulation before mold can take hold. Use moisture meters to confirm what your eyes can’t see, and keep dehumidifiers running until readings return to normal. Belonging to a prepared team means you don’t guess; you verify.
Remove baseboards and open trapped cavities.
Pull wet insulation and damaged drywall.
Monitor humidity and surface moisture twice daily.
Focus on airflow, temperature, and material thickness, because each affects drying time. If wood stays damp, it can warp and feed mold.
If you’re unsure whether a space is dry enough, call restoration help before contamination spreads. Precision now protects your home and your crew.
Clean and Disinfect Damaged Surfaces
After the damaged area is dry and safe to enter, you should clean all affected surfaces with soap and water, then disinfect them with an appropriate antimicrobial solution to reduce the risk of mold and bacterial growth.
Use gloves, eye protection, and good ventilation while you work. Scrub hard, nonporous surfaces with a clean cloth or brush, then rinse them if the product label requires it.
Apply disinfectant at the listed concentration and keep the surface wet for the full dwell time, so it can do its job. Replace dirty rags and mop heads as needed.
For your crew and household, clear away debris, wash tools, and bag contaminated materials promptly.
When you finish, let everything air-dry completely before reusing the space.
Inspect Walls, Floors, and Ceilings for Hidden Damage
Look closely at walls, floors, and ceilings for signs that water has traveled beyond the obvious wet area. Check for soft drywall, bubbling paint, warped trim, and sagging ceiling panels.
Press gently near baseboards and around window frames to find hidden moisture. Use your nose too; a musty odor often means water’s trapped inside. Stay methodical so you and your team catch damage early and keep the space safe.
- Tap surfaces for hollow or damp spots.
- Inspect seams, corners, and joints for swelling.
- Look under flooring edges for discoloration or buckling.
If you find moisture behind finishes, open affected sections only as needed to confirm the extent.
Quick, careful inspection helps your cleanup stay organized and protects everyone working in the area.
Document the Damage for Insurance
Before you remove wet materials, document every affected area for your insurance claim. Take wide photos first, then close-ups of warped floors, stained drywall, soaked insulation, and standing water.
Include the burst pipe, shutoff valve, and any visible corrosion or failed fittings. Record the date, time, room location, and a brief note on what you see.
If you’ve moved items to protect them, photograph their original positions and their current condition. Save receipts for towels, buckets, fans, and temporary supplies.
Keep your notes organized in one folder, digital or paper, so you can share them quickly with your adjuster. Clear records help you prove the scope of loss, support your claim, and keep your team aligned during cleanup.
When to Call a Water Damage Pro
If the burst pipe has soaked drywall, flooring, insulation, or electrical systems, you should call a water damage pro right away.
You also need professional help when water has reached cavities, subfloors, or other hidden areas, because moisture can remain after surface cleanup.
A pro can assess the full extent of damage and reduce the risk of structural loss and mold growth.
Severe Damage Signs
When the water has spread beyond a single room, soaked drywall or insulation, or started affecting ceilings, flooring, or electrical systems, you should call a water damage pro right away. You’re dealing with severe damage signs that need fast, coordinated response.
Water keeps pooling after you shut off the supply.
Floors feel warped, soft, or unstable underfoot.
Electrical outlets, fixtures, or breakers show moisture exposure.
These conditions raise structural and safety risks, and your crew can’t rely on basic drying alone. A professional team uses meters, containment, and extraction equipment to control the loss efficiently.
Acting now helps you protect your home, reduce repair costs, and stay with a team that knows how to restore order.
Hidden Moisture Risks
Even after standing water is removed, moisture can stay trapped inside wall cavities, subfloors, insulation, and ceiling materials, where it keeps spreading damage you can’t see.
You need to check hidden areas with a moisture meter, not just rely on touch or smell. If drywall stays cool, flooring cups, paint blisters, or baseboards swell, water is still present.
That trapped moisture can feed mold within 24 to 48 hours and weaken framing, adhesives, and finishes.
Call a water damage pro when the affected area is large, the source was contaminated, or you can’t dry materials quickly with fans and dehumidifiers.
A qualified team can open assemblies, extract moisture, and verify drying so you can get your space back safely and confidently.
Prevent Future Burst Pipes
To prevent future burst pipes, insulate exposed plumbing, seal drafts near pipe runs, and keep indoor temperatures steady during cold weather. You can also drain exterior hose bibs before freezing weather arrives and shut off irrigation lines early.
Inspect vulnerable areas after every cold snap so you catch small leaks before they spread.
- Wrap crawlspace, attic, and garage pipes with closed-cell insulation.
- Let faucets drip slightly when temperatures drop below freezing.
- Schedule annual plumbing checks to verify pressure, valves, and aging pipe joints.
When you follow these steps, you protect your home and join the group of owners who stay ahead of winter damage.
If you live in an older building, consider pipe relocation or heat tape for recurring trouble spots.
Frequently Asked Questions
What Signs Indicate Hidden Water Damage Behind Walls?
You’ll notice hidden water damage behind walls through musty odors, peeling paint, bubbling wallpaper, warped trim, discolored drywall, soft spots, or unexplained mold. You might also hear dripping or see rising humidity indoors.
How Long Before Mold Starts After a Burst Pipe?
Mold can start within 24 to 48 hours after a burst pipe, and you’ll feel the damp air turn sour fast. Dry wet surfaces, remove soaked materials, and call restoration pros if moisture lingers.
Does Homeowners Insurance Cover Burst Pipe Cleanup?
Usually, yes—your homeowners insurance often covers sudden burst-pipe cleanup and resulting damage, not neglected maintenance. You’ll need to document losses, file promptly, and check your policy’s water-damage limits, exclusions, and deductible.
Can I Use a Regular Fan to Dry Wet Areas?
You can use a regular fan, but you’ll dry surfaces slowly, move air poorly, and miss trapped moisture; use multiple fans, open pathways, and dehumidifiers, so you reduce risk, speed drying, and protect your home.
When Should I Replace Damaged Drywall After Flooding?
You should replace drywall once it’s soft, swollen, crumbling, or moldy, usually after 24–48 hours of saturation. You can’t reliably dry it if it’s fully soaked, so cut out damaged sections quickly and inspect framing.
Conclusion
You’ve got a small window to limit burst pipe water damage, so act fast. Shut off the water and power, then contain the spill and remove standing water. Dry the area well before mold gets a foothold, and check walls, floors, and ceilings for hidden moisture. Photograph everything for insurance, and call a pro if the damage looks beyond your reach. A quick, orderly response helps you avoid a much bigger headache later.