Does flood damage really keep spreading after the water looks gone? When you face major water loss, you need to act fast: assess the source, contain the area, document the damage, and extract standing water before it wicks into walls and floors. Then you dry hidden cavities, disinfect surfaces, and sort salvageable items. The right sequence can limit mold, reduce structural failure, and change what happens next.
Key Takeaways
- Assess the source, extent, and safety risks, then document damage and create a restoration plan.
- Contain the flood quickly by stopping water migration, shutting HVAC vents, and removing standing water.
- Dry the structure with air movers and dehumidifiers while monitoring hidden moisture with meters.
- Clean, disinfect, and sort salvageable belongings to reduce contamination and mold growth.
- Repair damaged structural materials only after confirming they are dry and safe, ideally within 24–48 hours.
How Flood Damage Restoration Works
Flood damage restoration starts with a detailed assessment of the affected area so technicians can identify the source of water, determine the extent of damage, and prioritize safety.
You’ll then see them document materials, moisture levels, and structural concerns to build a precise restoration plan.
During flood damage restoration, they use containment, controlled removal, and targeted drying to stabilize the space without adding stress to your home.
You stay informed as technicians monitor humidity, inspect hidden cavities, and adjust equipment to match conditions.
This methodical process helps protect your property, reduces secondary damage, and supports a steady recovery.
When you understand each step, you’re not facing the loss alone; you’re part of a clear, organized process designed to restore confidence and comfort.
Start Flood Damage Cleanup Fast
Act quickly after floodwater enters your property, because every hour of delay increases the risk of structural deterioration, mold growth, and permanent material loss.
You should contact a qualified restoration team immediately, then document the affected areas for your records.
Next, you can begin removing wet contents that are safe to handle and place salvageable items in a dry, clean area.
If you act with a trained crew, you’ll get organized triage, moisture mapping, and controlled drying started right away.
That early response helps you protect your home’s structure and preserve what matters most to you and your household.
You’re not facing this alone; a coordinated cleanup plan gives you a clear path forward and keeps recovery moving with confidence, speed, and precision.
Keep Water Damage From Spreading
As soon as water is present, you should isolate the affected area to stop it from migrating into dry rooms, wall cavities, and subflooring. Close doors, seal gaps with plastic sheeting, and lay absorbent barriers at thresholds to define the wet zone.
If you can, shut off HVAC vents in the damaged space so airflow doesn’t carry humidity and debris elsewhere. Protect nearby furnishings, boxes, and electronics by moving them to a dry room that’s already stable.
Keep foot traffic limited, because each step can track moisture and contaminants outward. Use towels or foam under doorways where water is creeping.
When you control the perimeter early, you help your restoration team work as one unit, protect your home’s structure, and keep recovery moving in the right direction.
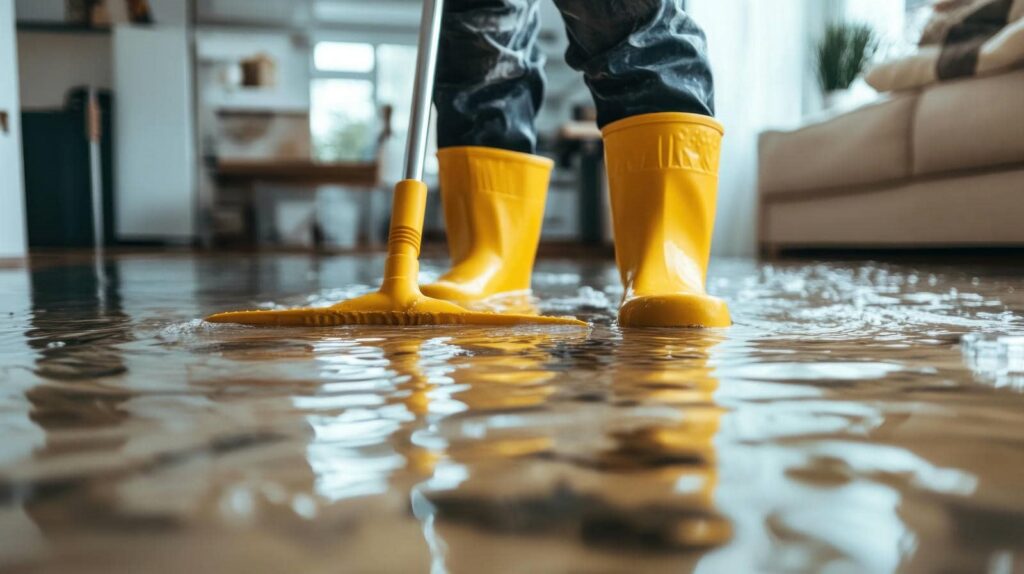
Remove Standing Water and Moisture
You should extract standing water quickly with pumps or wet vacuums to limit further saturation and speed recovery.
Then you’ll dry affected surfaces with airflow, dehumidification, and direct ventilation to stabilize materials.
Finally, you’ll reduce hidden moisture by checking cavities, flooring, and structural voids so you can prevent lingering damage and mold growth.
Extract Standing Water Quickly
Standing water should be extracted immediately to limit ongoing damage and slow microbial growth. You’ll want to use submersible pumps, wet vacuums, and weighted extraction tools to remove pooled water from floors, cavities, and low points as soon as it’s safe.
Work methodically from the deepest areas outward so you don’t push water into unaffected spaces. Monitor the process with moisture meters and inspect hidden pockets behind trim, under cabinets, and beneath carpets.
If electrical hazards, contaminated water, or structural instability are present, call trained restoration professionals right away. Acting fast helps you protect your home, your routine, and the people who count on you.
When you respond quickly and carefully, you give your space the best chance to recover cleanly and completely.
Dry Affected Surfaces
Once pooled water is removed, dry every affected surface as quickly as possible to stop moisture from soaking deeper into building materials. You can move fast and stay methodical, because each hour matters after flood damage restoration.
Use clean towels, air movers, and steady airflow across floors, walls, trim, and furniture. Keep surfaces separated so air can reach them evenly, and wipe away visible dampness before it lingers.
- Prioritize porous materials first.
- Lift rugs and cushions for airflow.
- Dry edges, seams, and corners thoroughly.
- Recheck surfaces until they feel dry.
When you work in a coordinated way, you help your space return to normal sooner. You’re not handling this alone; careful drying gives your home the best chance to recover well.
Reduce Hidden Moisture
After the visible water is gone, focus on hidden moisture by removing standing water from low spots, cavities, and trapped spaces before it can spread or feed mold growth.
You’ll need pumps, wet vacs, and absorbent pads to pull water from flooring seams, wall voids, and appliance bases.
Then use air movers and dehumidifiers to create steady airflow and lower humidity.
Check baseboards, insulation, and subfloor edges with a moisture meter, because surfaces can feel dry while material stays damp inside.
Open access panels where safe, and remove saturated contents that trap water.
Work methodically, document readings, and keep equipment running until levels stabilize.
When you handle each hidden pocket, you protect your home and help everyone inside get back to normal faster together.
Dry Walls, Floors, and Hidden Spaces
You need to dry walls, floors, and hidden spaces quickly because trapped moisture can keep spreading damage long after the visible water is gone.
You’ll protect the structure by moving air, lowering humidity, and checking cavities that don’t dry on their own.
Remove baseboards and open access points so airflow reaches framing.
Position fans to push air across damp surfaces, not just at them.
Use dehumidifiers to pull moisture from enclosed rooms and subfloors.
Monitor readings daily until materials return to safe levels.
Stay methodical; rushed drying can leave pockets wet and invite repeated repairs.
When you work this way, you’re not alone—you’re restoring the home with a team approach that helps every surface recover predictably and safely.
Clean and Disinfect Flooded Areas
You’ll remove contaminated debris first, because soaked drywall, insulation, and porous materials can hold harmful residues and spread contamination.
Next, you’ll disinfect all affected surfaces with an appropriate cleaner, making sure you cover floors, walls, trim, and any tools that stayed in the flood zone.
This step helps you prevent mold growth by reducing the moisture and microbial load that can trigger faster deterioration.
Remove Contaminated Debris
Start by removing all contaminated debris so flood damage restoration can move forward safely and efficiently. You’ll protect your team, reduce odors, and clear access for the next phase.
Work methodically and sort materials as you go:
- Bag small trash, soaked insulation, and food waste.
- Remove porous items that held dirty water.
- Separate sharp or unstable debris into rigid containers.
- Move waste to a designated pickup area.
Wear gloves, boots, and a respirator if conditions warrant. Keep pathways open and containers sealed so you don’t spread contamination back into clean zones.
If you’re working with others, assign one person to track debris flow and maintain order. Your crew’s steady, careful removal builds momentum and helps everyone feel confident about the recovery process.
Disinfect Surfaces Thoroughly
With contaminated debris removed, clean and disinfect every exposed surface so flood damage restoration can proceed in a sanitary environment.
You should wash walls, floors, trim, cabinets, and hard furniture with warm water and detergent, then rinse away residue.
Next, apply an EPA-registered disinfectant at the label’s required concentration and contact time.
Use clean cloths, mops, and sprayers, and change solutions when they look dirty.
Pay close attention to seams, corners, and touchpoints such as handles and switches.
Wear gloves, eye protection, and boots while you work, and keep the area ventilated.
If you stay systematic, you’ll help your space feel safe again and support the next phase of restoration with confidence.
Prevent Mold Growth
To prevent mold growth after flooding, dry and disinfect the area as quickly as possible so moisture doesn’t remain long enough for spores to spread. You should clean hard surfaces with detergent, then apply an EPA-registered disinfectant that matches the material and contamination level.
In your recovery plan, follow these steps:
- Remove standing water and wet debris.
- Open windows, run fans, and dehumidify continuously.
- Sanitize walls, floors, and fixtures, then rinse if directed.
- Inspect hidden spaces behind trim, under cabinets, and inside cavities.
When you act promptly, you protect your home and your household from lingering odor, staining, and structural decay.
You’re not managing this alone; a careful, shared effort helps you restore a safe, healthy space with confidence.
Salvage Belongings After Flooding
Once the water has receded, you should salvage belongings by sorting items quickly and separating what can be cleaned from what must be discarded.
Move methodically through each room and prioritize photos, documents, medications, and valuables first.
Wear gloves and a mask, then place damp but salvageable items in a clean, dry area with airflow.
Rinse mud from hard surfaces, and blot textiles instead of rubbing them.
Label each group so you can track what’s safe to keep, what needs professional cleaning, and what’s lost.
Keep electronics off until they’re inspected.
If you work with your family, assign simple tasks so everyone stays organized and supported.
This careful process helps you protect what matters most and rebuild a sense of normalcy together.
Repair Structural Damage Safely
After you’ve removed standing water and salvaged what you can, inspect the structure before starting any repairs. You’ll want to check load-bearing walls, floor framing, joists, and support posts for warping, cracking, or movement.
If anything seems unstable, don’t enter areas under strain until a qualified pro confirms they’re safe. Use proper PPE, keep power off, and work with a buddy so you’re never handling hazards alone.
- Mark damaged zones clearly.
- Remove unsound materials in stages.
- Replace only dry, rated components.
- Refasten joints to code.
Measure moisture in wood and masonry, then verify each repair before closing surfaces.
Why Fast Restoration Prevents More Damage
Fast restoration matters because water keeps moving long after the visible flooding stops, soaking deeper into framing, drywall, insulation, and finishes. You protect your property by starting extraction, drying, and dehumidification quickly, before moisture feeds swelling, warping, and hidden decay.
Fast action also limits mold growth, since spores can colonize damp surfaces within 24 to 48 hours. When you verify moisture levels with meters, you can track progress and confirm each material is drying to safe ranges. You also reduce corrosion in fasteners, electrical components, and metal fixtures.
Acting now helps your home stay stable, clean, and safe, and it keeps your household connected to a recovery process that feels organized, not overwhelming. With each hour saved, you lessen secondary damage and strengthen the chance of full restoration.
Frequently Asked Questions
How Do I Document Flood Damage for Insurance Claims?
You’ll photograph every damaged area, list affected items, note dates, and keep receipts. You should contact your insurer, preserve wet materials, and document water levels and cleanup steps to support your claim quickly and clearly.
When Should Electrical Systems Be Inspected After Flooding?
Inspect electrical systems immediately after floodwaters recede and before you reenergize anything; even a tiny hidden fault can feel like a house-sized threat. You’ll need a licensed electrician to test wiring, panels, and outlets safely.
Can Mold Start Growing Before Visible Drying Is Finished?
Yes, mold can start growing before visible drying finishes, especially within 24–48 hours. You should dry materials fast, control humidity, and inspect hidden cavities so you protect your space and keep everyone safer.
Which Belongings Are Usually Impossible to Restore After Flooding?
You’re usually unable to restore soaked drywall, insulation, particleboard furniture, mattresses, upholstered items, and food. You’ll also lose electronics with corrosion. Think of them as storm-marked relics; you’ll sort, document, and discard them methodically.
Do I Need Permits for Major Flood Repairs?
Yes, you’ll often need permits for major flood repairs. You should check with your local building department first, because structural, electrical, plumbing, and mold-related work usually requires approval before you start.
Review
When you move fast, you stop flood damage from spreading like a silent chain reaction. You document the loss, extract standing water, dry hidden spaces, and disinfect affected surfaces to reduce mold and decay. Then you salvage what you can and repair structural damage safely. By following each step in order, you protect your home, limit long-term repairs, and speed recovery. Careful, timely action isn’t just helpful—it’s the foundation for a safer restoration.