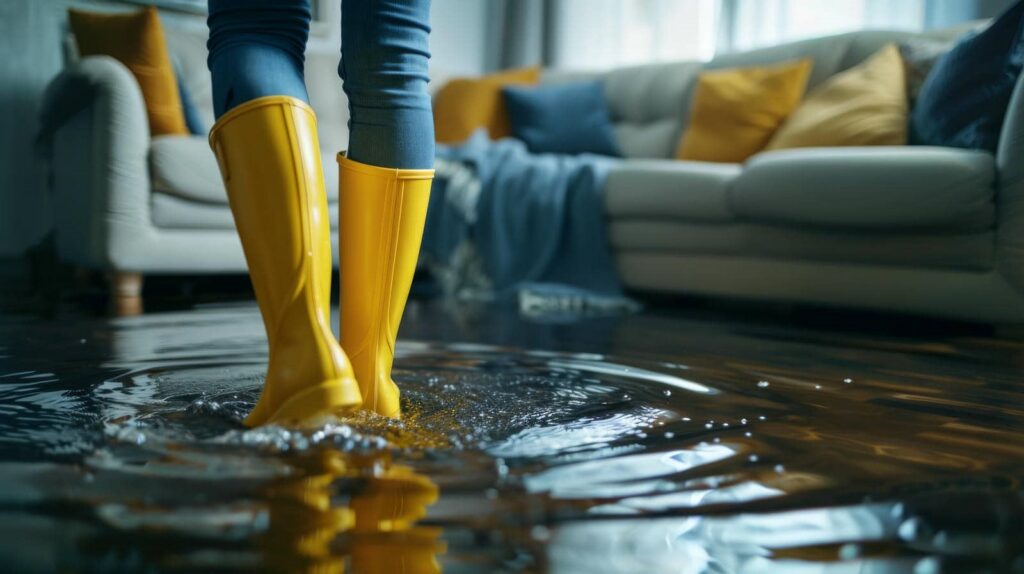
You’re not alone when a flood hits. You need to move fast, remove wet materials, and verify the structure is safe before hidden moisture turns into mold. From drying and disinfection to repairs and future flood protection, each step changes what comes next—and the first few hours matter most.
Key Takeaways
- Start cleanup quickly, document damage, and check for electrical, gas, and structural hazards before entering extensively.
- Remove standing water and soaked materials immediately, then dry the house with fans, dehumidifiers, and ventilation.
- Separate salvageable items from contaminated belongings, inventory losses, and follow local disposal and insurance guidelines.
- Clean and disinfect all flooded surfaces, then replace damaged drywall, insulation, flooring, studs, and other compromised materials.
- Rebuild with flood-resistant improvements, seal entry points, improve drainage, and verify all repairs for long-term resilience.
Start Flooded House Cleanup Fast
Start flooded house cleanup fast to limit further damage and reduce the risk of mold, structural deterioration, and unsafe indoor conditions. You’re protecting your home’s structure, finishes, and indoor air when you act within hours, not days.
Begin flooded house restoration by documenting visible damage, checking for electrical hazards, and clearing access so professionals can assess the space safely. Wear protective gear, keep children and pets out, and separate salvageable items from contaminated belongings.
Create a simple inventory, note moisture patterns, and follow local guidance for health and disposal requirements. Quick, organized action helps your restoration team stabilize materials, identify hidden issues, and plan the next steps with confidence.
You’re not doing this alone—steady, informed cleanup sets the foundation for full recovery.
Remove Water and Wet Materials
Pump out standing water and remove soaked materials as soon as the area is safe to enter, because every hour of delay increases damage and mold growth.
You should use submersible pumps, wet vacs, and heavy-duty extractors to clear floors, carpets, padding, and trapped water from low spaces.
Lift out saturated insulation, drywall, baseboards, and textiles that can’t dry quickly or safely.
Bag debris right away to reduce odor and limit contamination.
Keep salvageable items in a clean, dry staging area so you can sort them later.
Work methodically from the wettest zones outward, and record what you remove for insurance and repair planning.
When you act fast and stay organized, you protect your home’s materials and help your recovery team move with confidence.
Check for Structural Damage and Safety Hazards
You should inspect load-bearing elements such as beams, joists, studs, and foundation walls for warping, cracking, or settlement before you proceed.
Check for hidden hazards, including compromised wiring, gas leaks, sewage contamination, and unstable materials behind walls or under floors.
If you find damage or uncertainty, stop work and bring in a qualified professional so you can keep the site safe.
Inspect Load-Bearing Elements
After floodwater recedes, inspect load-bearing elements for structural damage and safety hazards before anyone reenters the affected area.
You should check beams, joists, columns, posts, headers, and foundation walls for cracking, displacement, sagging, or crushing. Look for wood that’s warped, split, or softened by prolonged saturation, and note metal connectors that may have bent or loosened.
If floors feel uneven or walls lean, limit access and document the condition. You can use a level, flashlight, and camera to record findings clearly.
If you see significant deflection, spalling, or separation at connections, contact a licensed structural professional right away.
Careful inspection helps you protect your home, keep your crew aligned, and move confidently toward safe restoration together.
Identify Hidden Hazards
Hidden hazards often remain even after standing water is gone, so inspect the property for structural damage and safety risks before starting cleanup. You should check floors, walls, ceilings, and stairways for sagging, cracking, or movement that could signal compromised framing.
Look for energized wiring, gas leaks, sharp debris, and contaminated insulation. If you smell fuel, hear hissing, or see damaged outlets, shut off utilities only if you can do so safely and call licensed professionals.
Wear gloves, boots, and eye protection, and mark unsafe rooms so no one enters by mistake. You’re not alone in this process; careful documentation helps your restoration team plan the right repairs.
Identifying hidden hazards early protects your crew, speeds recovery, and keeps your home’s rebuild on solid ground.
Dry the House Before Mold Starts
You need to speed up moisture removal with dehumidifiers, fans, and targeted ventilation as soon as it’s safe to begin.
Increase air circulation through open pathways and directed airflow so wet materials dry evenly and quickly.
Monitor hidden dampness in wall cavities, subfloors, and insulation, since trapped moisture can trigger mold before you notice visible signs.
Speed Up Moisture Removal
To speed up moisture removal, start drying the house immediately with high-velocity air movers, dehumidifiers, and continuous ventilation where conditions allow.
You’ll reduce the time water has to soak framing, subfloors, and finishes, which helps protect your home from mold and secondary damage.
Monitor moisture with meters in affected materials, not just visible surfaces, so you can verify progress and adjust equipment as needed.
Remove wet insulation, saturated carpets, and damaged drywall promptly, since trapped moisture slows recovery.
Keep indoor humidity low and check that power, drainage, and equipment placement stay stable.
If you’re working with a restoration team, ask for daily readings and drying goals.
You’re not alone in this process, and disciplined drying gives your home the best chance to recover cleanly.
Increase Air Circulation
Once standing water is removed and drying equipment is in place, increase air circulation through the affected areas so moisture doesn’t linger in wall cavities, under flooring, or behind furnishings.
You’ll help the space dry faster when you open interior doors, lift curtains, and reposition furniture to let air move freely. Use fans to push air across wet surfaces, but don’t aim them only at one spot.
Keep HVAC running if it’s safe and clean, because steady airflow supports consistent drying.
- Clear paths for air movement
- Separate damp items from dry ones
- Keep vents unobstructed
You’re not just drying a house; you’re restoring a familiar place for everyone who lives there, and controlled airflow helps protect that shared comfort.
Monitor Hidden Dampness
Hidden dampness can linger long after surfaces feel dry, so check wall cavities, baseboards, subflooring, insulation, and the backs of cabinets for moisture before mold can take hold.
Use a moisture meter and, if possible, an infrared camera to spot cool, wet areas behind finishes. Pull off trim or small access panels where needed, and verify that readings return to normal across every room.
Keep dehumidifiers and fans running until hidden spaces match dry conditions, not just the visible ones.
If you notice swelling, musty odor, or staining, treat that area as active moisture and dry it again.
You’re not alone in this step; careful monitoring now helps your home recover fully, safely, and with confidence.
Clean and Disinfect Flooded Surfaces
After the water is removed, you should clean and disinfect every flooded surface to stop contamination from spreading. Wear gloves, eye protection, and a mask, then remove mud, silt, and residue with detergent and warm water.
Work from the cleanest area toward the dirtiest so you don’t recontaminate surfaces. Rinse well, then apply an EPA-registered disinfectant at the label’s recommended dilution and contact time. Let each surface stay visibly wet long enough for the product to work.
- Clean hard, nonporous surfaces first.
- Disinfect high-touch points like switches and handles.
- Launder or discard contaminated fabrics promptly.
You’re restoring a safer home step by step, and careful sanitation helps your space feel secure again.
Repair Walls, Floors, and Fixtures
With surfaces cleaned and disinfected, you can begin rebuilding the damaged parts of the home. Remove compromised drywall, insulation, trim, and subflooring until you reach sound material.
Replace warped studs, joists, and sheathing if inspection shows decay or structural loss. Install moisture-resistant wallboard in areas that stayed dry enough for reuse, and fasten it to code.
For floors, set new underlayment, patch or replace damaged decking, and refit finished flooring once the base is level and dry.
Reinstall fixtures, cabinets, and hardware only after you confirm secure anchors and intact plumbing connections.
You’re not restoring alone; each precise repair brings your space back to a home that feels safe, steady, and truly yours.
Keep measurements accurate, follow manufacturer specs, and verify every surface before closing walls.
Finish Repairs and Reduce Future Flood Risk
Once the major repairs are complete, you can finish the remaining details and lower the chance of future flooding by sealing gaps, repainting repaired surfaces, and reinstalling final trim, outlets, and cover plates.
You’ll restore a clean, integrated finish that helps your home feel like yours again. Inspect baseboards, caulk joints, and test electrical devices before you close walls fully. Verify that flooring connections sit flat and that doors operate without binding.
- Seal penetrations around pipes and vents.
- Check grading, gutters, and downspouts.
- Document repairs for insurance and maintenance.
If you add sump or backflow protection, follow local code and manufacturer instructions.
These final steps protect your space, support your family’s comfort, and make your rebuilt home more resilient.
Frequently Asked Questions
How Do I Document Flood Damage for an Insurance Claim?
Photograph every damaged area, item, and waterline, then create a dated inventory with estimated values. Keep receipts, moisture readings, and repair quotes. You’ll strengthen your claim by organizing evidence clearly and submitting it promptly.
When Should I Call a Professional Restoration Company?
You should call a professional restoration company immediately after flooding, especially if water’s contaminated, damage’s extensive, or hidden moisture exists. They’ll assess hazards, dry your home, prevent mold, and help you recover faster.
Can Flood-Damaged Belongings Be Salvaged Safely?
Yes, you can salvage some flood-damaged belongings safely, but you shouldn’t guess. You’ll need to sort, disinfect, and dry items fast; porous materials often need disposal. A professional can help you keep what’s worth saving.
How Long Does the Insurance Claim Process Usually Take?
You’ll usually wait 2 to 8 weeks, depending on your insurer, damage complexity, and documentation speed. You can shorten delays by submitting photos, inventories, estimates, and promptly answering adjuster questions throughout the review.
What Permits Are Needed for Major Flood Repairs?
You’ll usually need building, electrical, plumbing, and mechanical permits for major flood repairs, plus demolition or grading permits if structural work changed. I once saw one missing permit delay a rebuild, so you’ll want approvals early.
Recap
In a flood, you don’t get the luxury of drama—just a wet house demanding triage. You’ve cleared water, dried the structure, and scrubbed away what the flood left behind. Now you can rebuild with intent: replace damaged materials, verify safety, and improve drainage so the next storm doesn’t audition for disaster again. If you’ve followed the process, you’re not just repairing a house; you’re restoring a safer, tougher home.