
People in the U.S. face a water damage emergency each day, and the first few minutes can decide how much you lose. You should shut off the main water supply, cut power to the affected area, and protect yourself before you touch anything else. Then document the damage and start removing standing water. What you do next can change the cleanup outcome fast.
Key Takeaways
- Shut off the main water supply and cut power to the affected area at the breaker.
- Avoid wet switches, cords, and standing water until the area is confirmed safe.
- Wear gloves, boots, and eye protection before entering the damaged area.
- Photograph all damage and list affected items before moving or discarding anything.
- Remove standing water quickly and start drying with fans, airflow, and dehumidifiers.
First Steps After Water Damage
As soon as you notice water damage, you should shut off the water source if it’s safe to do so, then turn off electricity in the affected area to reduce the risk of shock.
Next, document the damage with photos and notes for your insurer and your emergency water damage cleanup team. Move dry valuables, electronics, and documents to a secure area.
If you can do so without spreading contamination, remove standing water with towels, a wet vacuum, or a pump. Open windows for airflow when weather allows.
Start removing damp rugs and lightweight furnishings to limit absorption. Wear gloves and boots to protect yourself.
Stay alert for warped floors, stained walls, and hidden moisture. Acting fast helps your home’s recovery and keeps you connected to a team that knows what to do.
Shut Off Water and Power
First, shut off the main water supply if you can reach it safely, then cut power to the affected area at the breaker panel. This step helps you slow active flooding and reduce electrical hazards while your team regroups and works the plan. If you’re unsure which breaker controls the wet zone, switch off the main if needed. Stay calm and move deliberately.
- Turn the valve clockwise until it stops.
- Use the main breaker if water is near outlets.
- Never touch wet switches or cords.
- Confirm faucets stop running.
- Let everyone in your household know power is off.
When you handle this promptly, you help protect the structure and keep your cleanup crew on the same page.
Protect Yourself and the Property
Once the area is electrically safe, you should protect yourself with gloves, boots, and eye protection before you enter wet spaces.
Wear a mask if you smell mold or dust, and keep kids and pets out of the area. Move through the space carefully, since soaked floors can hide weak spots, sharp debris, and slippery surfaces.
If water is rising, stop and wait for help. Protect the property by lifting furniture onto blocks or foil, removing rugs, and opening doors or windows for airflow when conditions allow.
Use plastic sheeting or tarps to shield dry rooms from tracked-in water. Keep a clear path for safe movement, and avoid pushing saturated items across floors.
Work calmly, stay alert, and help your home stay stable and safe.
Document the Damage for Insurance
Photograph all affected areas before you move or discard anything, and capture wide shots plus close-ups of visible water lines, staining, and structural damage.
Record each damaged item with a brief description, estimated value, and condition, then save receipts if you have them.
This documentation helps you support your insurance claim and speeds up the adjustment process.
Photograph All Affected Areas
Take clear photos of every affected area before you move or discard anything, since fast documentation can support your insurance claim and help verify the full extent of the damage.
Use your phone’s highest resolution and keep the lens clean for sharp, usable images. Include wide shots, medium shots, and close-ups so you capture both room context and surface detail. If it’s safe, turn on lights or use flash to reduce shadows.
- Photograph walls, floors, ceilings, and trim
- Capture standing water and wet materials
- Show warped, stained, or swollen surfaces
- Include doors, windows, and fixtures
- Keep each image time-stamped
Work methodically through the space, and don’t rush past hidden corners.
Clear, complete photos help your team stay aligned and make the next cleanup steps smoother.
Record Damaged Items
Create a detailed inventory of every damaged item so you have a clear record for your insurance claim.
List each room, object, model, serial number, purchase date, and estimated value. Note visible issues like swelling, staining, warping, mold, or electrical failure.
If you can, attach receipts, warranties, and prior photos to strengthen your file. Use a spreadsheet or claim app so you can update details fast and share them with your adjuster.
Separate salvageable items from items you’ve discarded, and keep disposal notes. Stay consistent with times, conditions, and locations.
When you document this way, you protect your household’s recovery and help your community of neighbors facing the same storm move forward with less stress.
Call an Emergency Water Damage Cleanup Team
You should call an emergency water damage cleanup team right away, because fast response limits moisture spread, structural deterioration, and mold growth.
Their technicians can assess the loss with the right tools, identify hidden saturation, and set the correct drying plan.
Acting quickly also helps you reduce repair costs and prevent further property damage.
Rapid Response Matters
When water damage hits, fast action can limit the spread of moisture and reduce the chance of structural deterioration, mold growth, and salvage loss. You need to call an emergency water damage cleanup team right away so you’re not fighting hidden moisture alone.
A rapid response helps protect your home and gives you a clear plan.
- Stop the water source if you can safely do so
- Move people and pets away from wet areas
- Keep traffic off soaked flooring
- Open doors for airflow if conditions allow
- Document visible damage before cleanup starts
When you act quickly, you stay ahead of secondary damage and keep recovery organized.
You’re not overreacting; you’re protecting your space, your routine, and your peace of mind.
Professional Damage Assessment
A professional damage assessment gives you a clear picture of what water has reached, what’s at risk, and what cleanup steps need to happen next.
You get trained eyes on hidden moisture, structural saturation, and contamination concerns before damage spreads. The team checks walls, subfloors, insulation, electrical areas, and HVAC pathways with meters, thermal imaging, and visual inspection.
You’ll know whether you need extraction, demolition, drying, or sanitation, and you can act with your crew fast and confidently. This step also helps document losses for your insurer and supports a safer recovery plan.
When you call an emergency water damage cleanup team, you’re not guessing—you’re joining a coordinated response built to protect your property and help your space recover right.
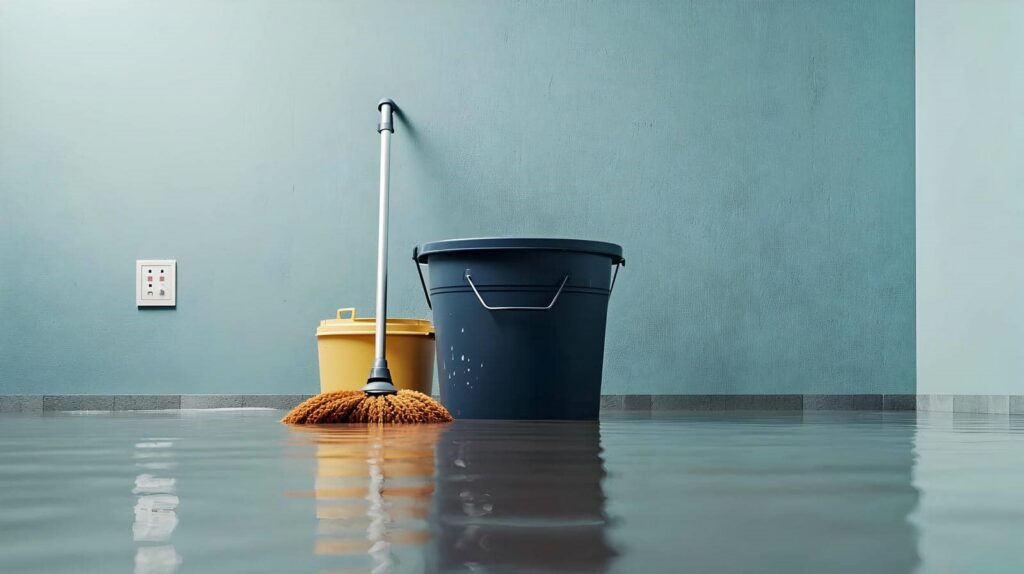
Remove Standing Water Fast
Remove standing water right away to limit seepage, swelling, and secondary damage to floors, walls, and contents. You’ll protect your space faster when you act methodically and use the right tools. If you’ve got a team, assign tasks so everyone moves together.
- Shut off electricity in wet areas.
- Wear gloves and waterproof boots.
- Use a wet/dry vacuum for shallow water.
- Mop and squeegee toward a drain.
- Bucket out deep water before vacuuming.
Work from the highest point of pooled water to the lowest. Remove furniture only if you can do it safely, and keep pathways clear.
Check hidden pockets under rugs, inside cabinets, and along baseboards. The goal is fast extraction, steady progress, and a safer recovery for your home.
Dry Out Walls, Floors, and Furniture
Start drying immediately to stop moisture from soaking deeper into drywall, subfloors, and furniture. Open windows if weather allows, then run fans to move air across wet surfaces.
Add dehumidifiers to pull vapor from the room and keep the space closed while they work. Remove cushions, rugs, and small furnishings so air reaches every side.
Lift furniture off wet flooring with blocks or foil pads to reduce staining and swelling. Pull baseboards only if you can do it safely, and expose hidden edges for faster drying.
Keep your HVAC fan on if your system is safe to use. Check progress often by touch and feel, and keep drying equipment running until materials feel dry and stable.
Check for Mold and Hidden Moisture
As drying continues, inspect for mold growth and hidden moisture in wall cavities, under flooring, behind baseboards, and inside insulation. Use a moisture meter to verify suspect areas, and watch for musty odors, discoloration, swelling, or soft spots. If readings stay high, keep air moving and dehumidification running until levels drop.
You’re not alone in this step; careful checks help your space recover safely.
- Probe trim seams and corners
- Lift a corner of carpet if needed
- Scan cool spots with infrared tools
- Check HVAC returns and nearby ducts
- Mark wet areas for reinspection
If you see visible mold, isolate the area and avoid disturbing it. Document findings so your crew can track drying progress and prevent hidden damage from spreading.
Save What Can Be Restored
After you’ve checked for hidden moisture and mold, sort the salvageable items right away so drying doesn’t get delayed.
Move clean, nonporous belongings to a dry staging area and keep them separate from contaminated waste. Wipe hard surfaces, rinse mud or residue, and place items on racks or towels to improve airflow.
For fabrics, remove excess water, hang them apart, and launder only if care labels allow. Photograph damaged items before handling them if you need records for your insurer.
Group documents, electronics, and keepsakes for special treatment, but don’t stack them tightly. You’re protecting both value and memory, so act methodically and keep your team organized.
Label boxes clearly, track what’s saved, and discard anything with structural damage, persistent odor, or visible growth.
When Repairs Should Begin
Repairs should begin only once the structure is dry, stable, and safe to work on. You need moisture readings, not guesswork, before you close walls or replace finishes.
If you rush, you can trap water, feed mold, and weaken framing. A qualified team should verify drying, then you can start permanent repairs with confidence and stay on track with the rest of the crew.
- Check subfloors, studs, and insulation for hidden moisture.
- Confirm electrical systems are de-energized and inspected.
- Replace damaged materials only after sanitation is complete.
- Match repairs to insurance scope and documentation.
- Coordinate with your contractor so your space stays safe and functional.
Frequently Asked Questions
How Much Does Emergency Water Damage Cleanup Usually Cost?
You’ll usually pay $1,000–$4,000 for emergency water damage cleanup, though minor jobs cost less and severe flooding costs more. You should expect higher rates for after-hours service, extraction, drying, and mold prevention.
Will My Insurance Cover Mold After Water Damage?
Usually, you’ll only get mold coverage if you act fast and the policy covers sudden water damage. Like a ticking clock in a flooded room, you should document, dry, and call your insurer immediately.
How Long Does Water Damage Restoration Typically Take?
You’ll usually need 3–7 days for drying and minor restoration, but severe damage can take weeks. You should start fast, because you’ll reduce structural loss, mold risk, and disruption to your home.
Can I Stay in My Home During Cleanup?
You can stay home if the damage is small and crews seal affected areas, but you’ll need safe power, dry air, and clear access. If mold, sewage, or structural issues appear, leave until professionals finish.
What Items Should I Throw Away After Flooding?
You should throw away soaked food, medicines, cosmetics, mattresses, insulation, and porous items that stayed wet over 24 hours. You’ll also discard sewage-contaminated materials, swollen drywall, and anything moldy, damaged, or impossible to sanitize safely.
Summary
When water damage hits, act fast. Shut off the water and power, protect yourself, and document everything before cleanup begins. Then call a qualified emergency water damage team to dry the space, check for hidden moisture, and save what you can. Think of each minute as a wrench in the works—delay can turn a small leak into a costly repair. With quick, careful steps, you’ll limit damage and get recovery underway sooner.